Entorno Pentesting y Hacking
I’m someone who often installs virtual machines for my testing, and I’ve become very accustomed to working in that environment as it’s more efficient for me. I find it frustrating to work in a regular environment now, it’s quite challenging for me haha.
I’m going to share my personal configuration of Bspwm + Polybar + VSC + nvim + Kitty + Spotify with you, which can be installed on any Linux distribution designed for Penetration Testing, Ethical Hacking, CTFs, etc.
I must say that I’m not a developer, so the code is quite straightforward. It lacks validations and could be infinitely improved. When installing, we’ll see how everything is set up. I’ve kept it this way to catch any errors. It serves its purpose, which is to install the entire environment on top of a freshly installed image. I encourage you to modify it to your liking. It’s something I’m planning to do myself as I prepare for OSCP, and I take any opportunity to practice scripting.”
Good Luck
Considerations
This script for the environment setup has been tested on the latest versions of Kali, Parrot, Ubuntu, and Arch Linux.
Before installing anything I will explain a little how the script of the three different versions works:
I recommend you to read the whole post before installing in environment.
bebiam
The -d parameter determines the distribution you want to install. Initially, it was intended for Kali and Parrot, as they are based on Debian. However, since many people have been asking me via DM if they can also install it on other distributions, I decided to make it work for Ubuntu as well, since it uses the apt package installer. By importing the repository records from Kali, you can use all Kali tools on any Debian-based distribution. Therefore, it will also work for Debian.
archlinux
Many also asked me if it works for Arch. It’s more complex than just replacing apt with pacman, so I decided to implement it. However, since Arch Linux is compatible with BlackArch repositories, it is no longer necessary to implement Kali’s repositories. Therefore, everything here uses pacman, aur, paru, and the entire BlackArch suite. A few considerations when setting up the distribution: assign more than 4GB of RAM, otherwise the Xorg grub won’t load, and you won’t be able to select the environment. Also, although it’s not always the case, sometimes Polybar might not compile. You just need to copy the four lines of code and press super + alt + r.
Repositories
I decided to implement optionally with the -r the installation of the repositories for some tools that I saw in the OSCP course, plus the ones that are installed by default, all the ones I used to solve the Play, Practice, and Challenges machines. This is because, imagine you’re in a CTF, Audit, or OSCP Exam environment, and you need to install tools you know or don’t know how to install, and they might fail or not. So, I’m covering this part. Of course, there are some tools that I couldn’t implement in the installation as a distribution because they have windows to select and pop-ups, plus they use specific versions of packages. That’s why I’ve installed the stable versions of everything, so if you need something specific, you can install it in a virtual environment. All of this will be installed in /opt and you must have more than 160gb of space.
LaTeX
This is optional -l and its installation adds more than 30 minutes to the BSPWM installation. It’s for people like us who prefer to create our reports in LaTeX and write code. If you prefer Word or LibreOffice, don’t install any of this.
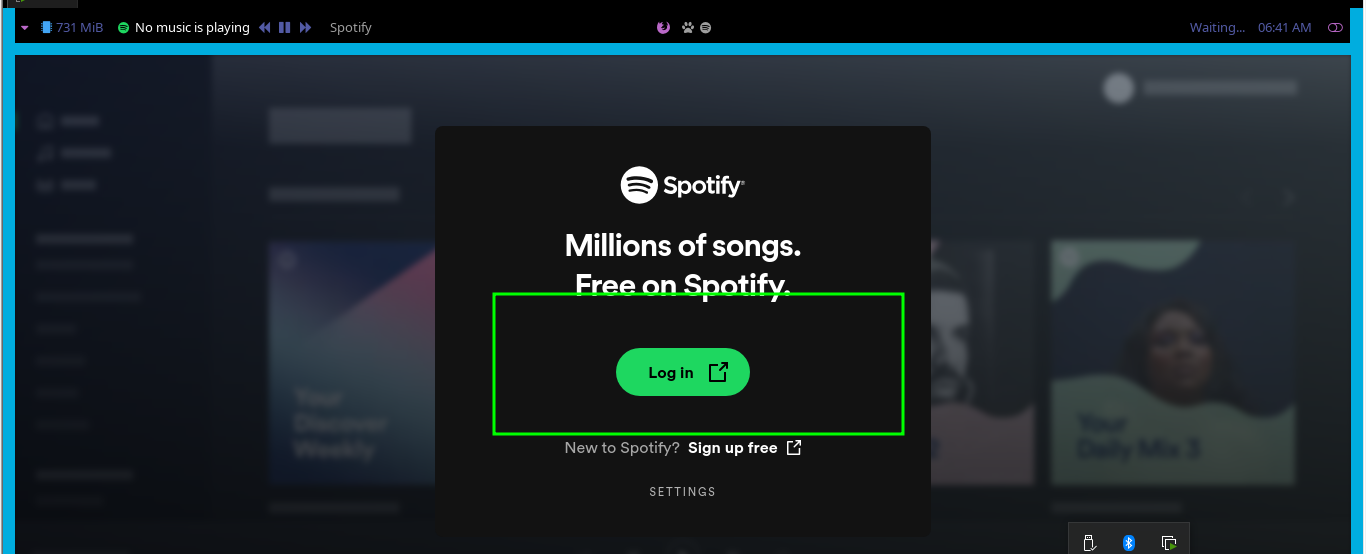
Spotify
Although it’s my favorite -s, I don’t have it installed because it consumes a lot of resources. I don’t recommend it for systems with less than 16 GB of RAM. Also, it takes 10 more minutes to install. I don’t install this on a virtual machine because it doesn’t make sense, but if you want to use Spotify on a laptop or physical computer installation, it’s recommended because it’s something you’ll always use. Also, the daemon on a physical machine is not the same as what’s implemented with the whole environment.”

You log in and you’re ready to go.
Installation
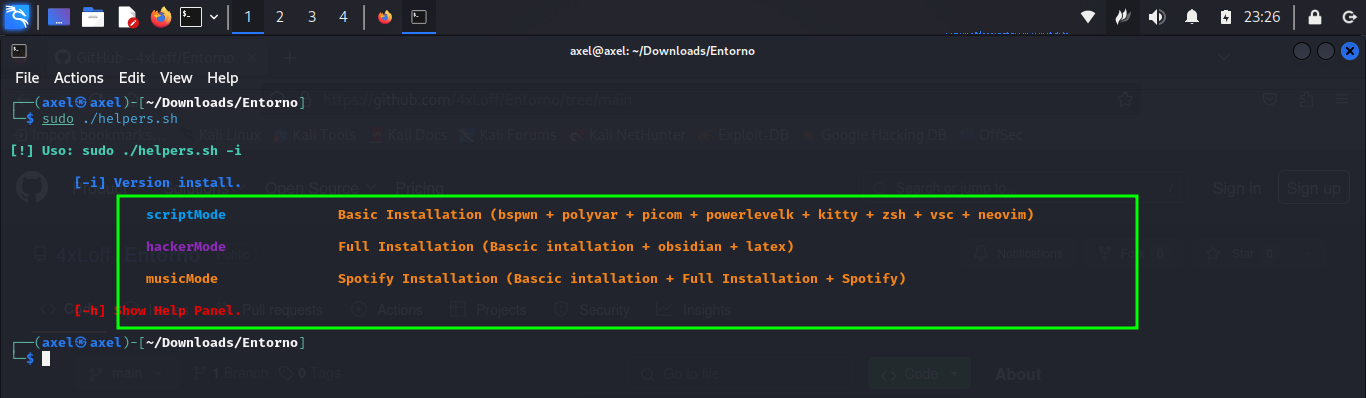
I have implemented everything so you don’t do anything, just clone the following repository and copy the following commands.
# file: "execute commands"
git clone https://github.com/4xLoff/Entorno-BSPWN.git
cd Entorno-BSPWN
chmod +x helpers.sh
sudo ./helpers.sh -d debian -r -l -s
You can choose which distribution you want to install the environment on, and you can also choose whether or not to add the optional flags. I invite you to read the code; although I do some checks, it should be executed in this way because I’m handling the dual-user assignment to install the tool. This is the way to install the necessary tools for each user with low privileges and root.
Cusiosities
Depending on the time of installation, only thing you need to do when you see screens asking you to restart some services is to press Enter,
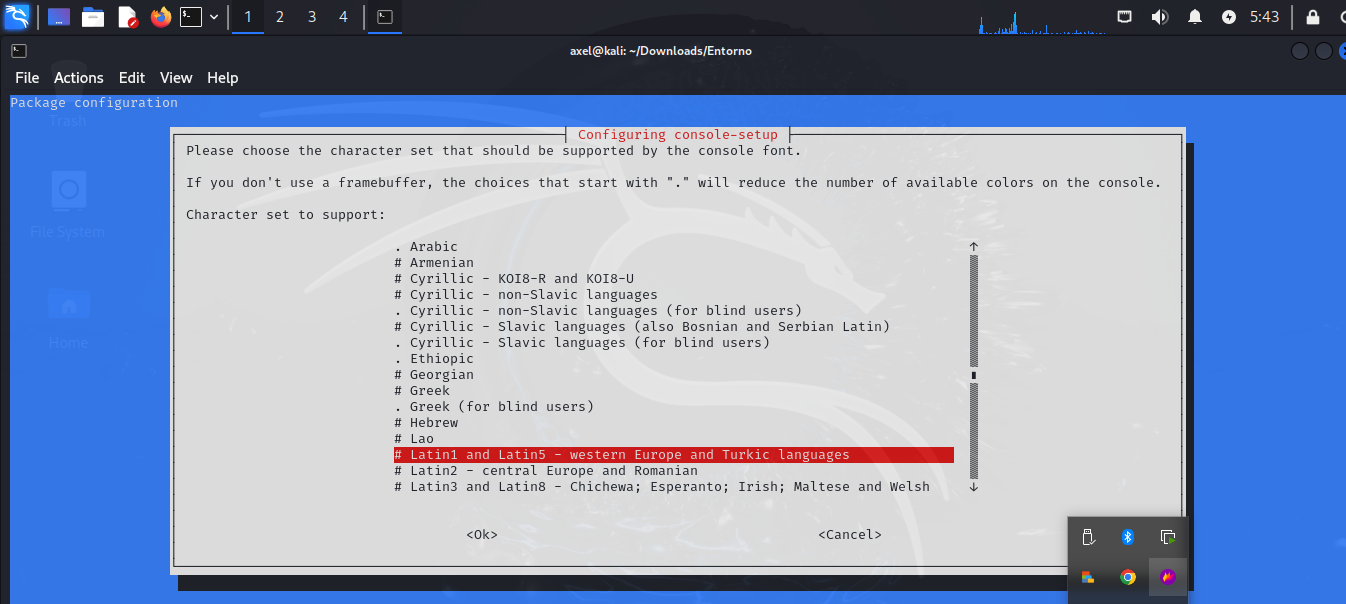
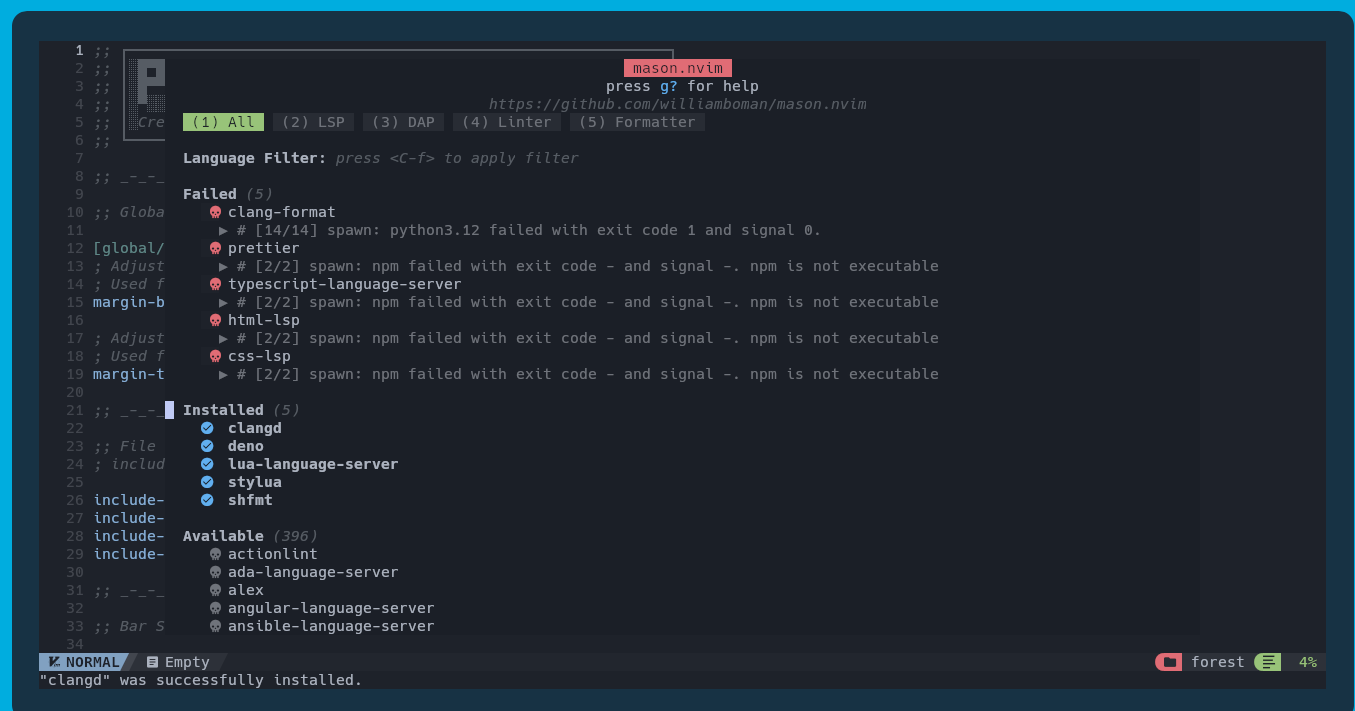
Or if it asks you to choose between yes or no, always select yes, or provide the password. Lastly, this is something I can’t skip: the installation of Neovim. Wait for the Lua packages to load and for all the screens to finish. To exit, type :x.
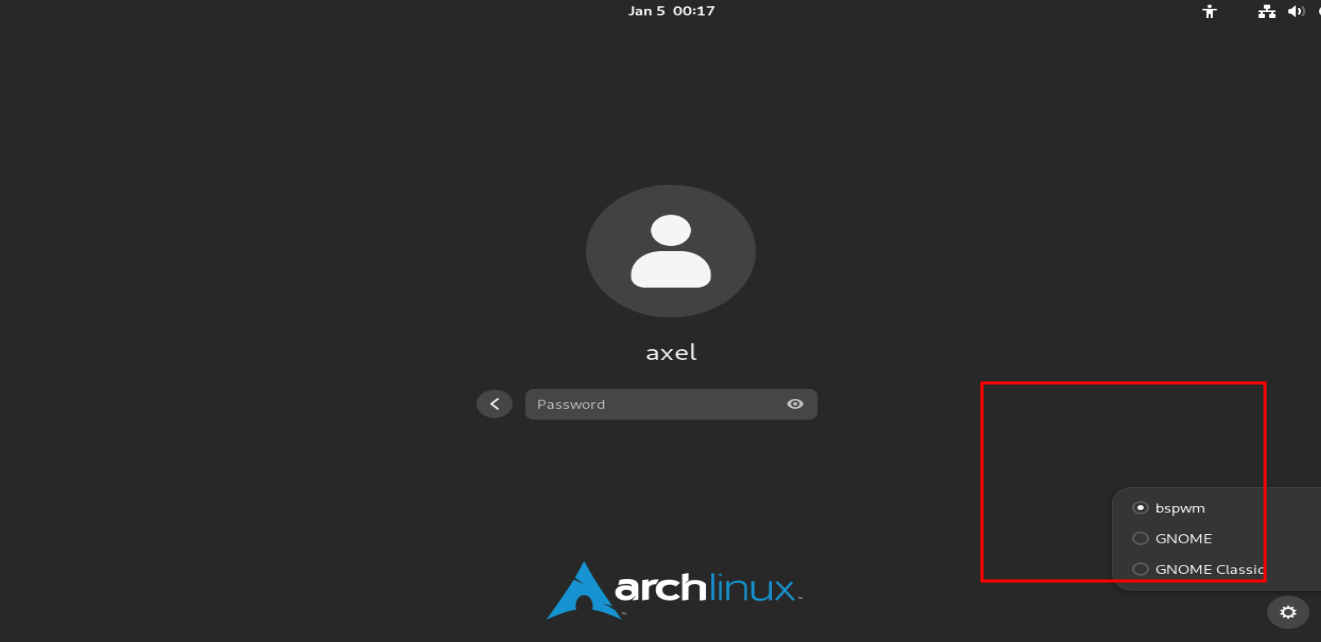
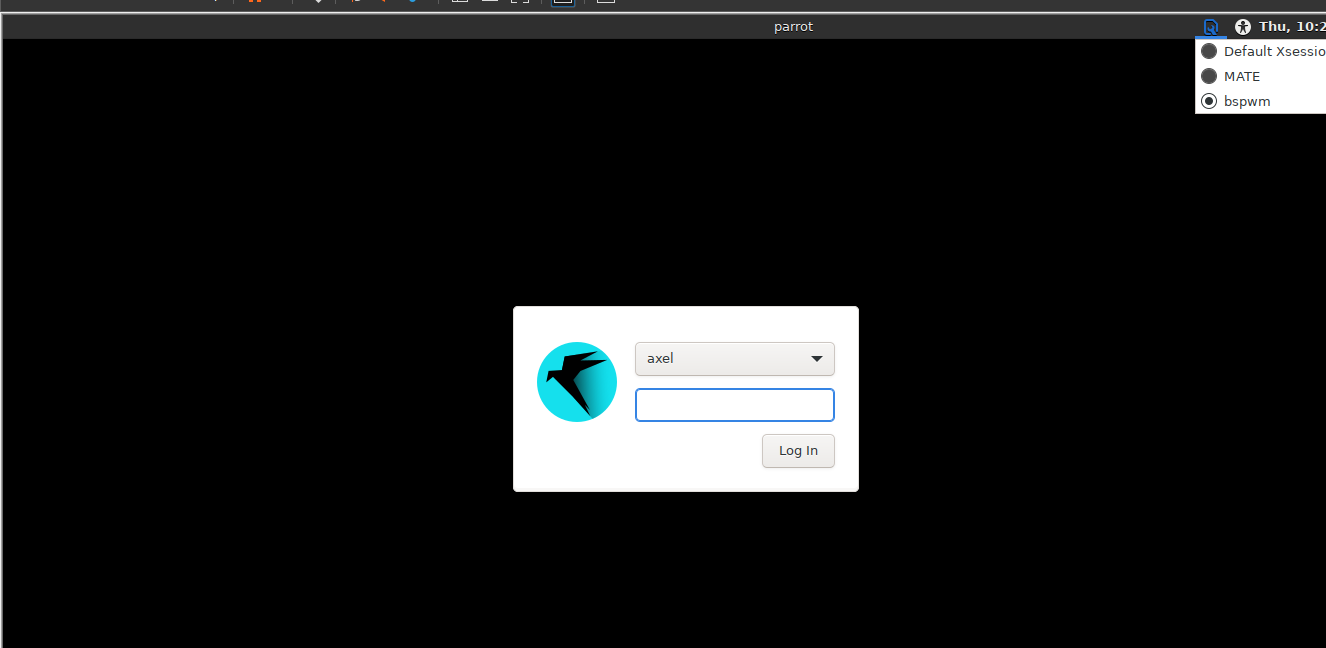
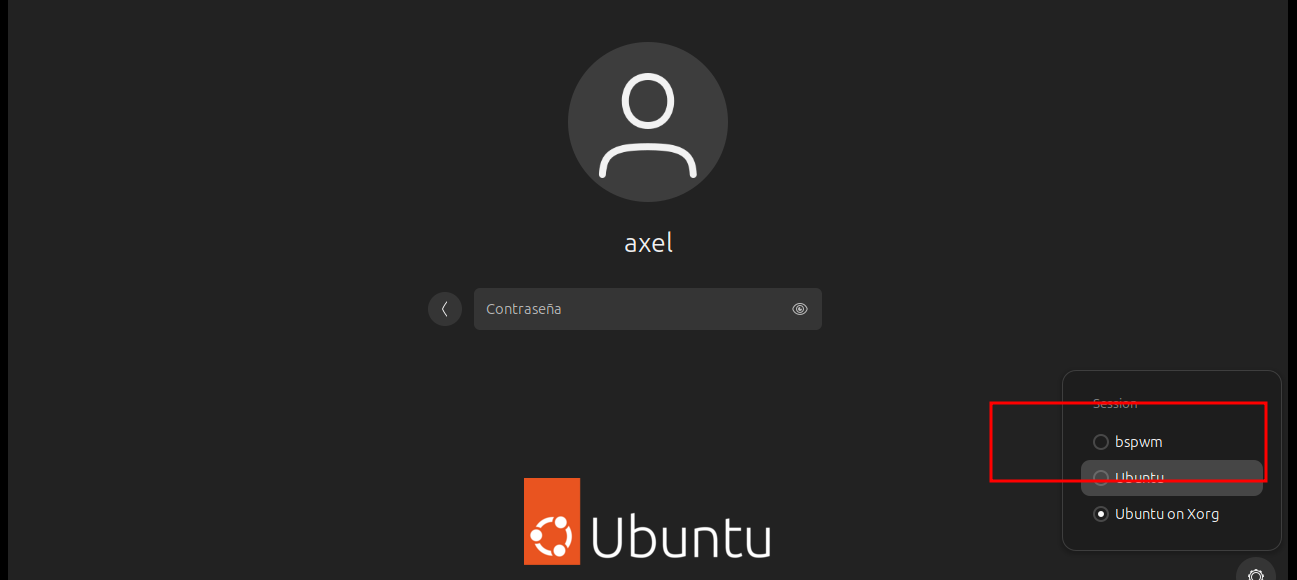
At some point it will change, you will log out, at this moment you will have to restart the system and to start the session choose the BSPWN option.
Choose tab bspwm kali.

Choose tab bspwm arch.
Choose tab bspwm parrot.
Choose tab bspwm Ubuntu.
I have automated the entire installation, so you no longer need to configure either zsh or powerlevel10k; these will load automatically. If you wish to edit anything, it’s in the configuration file. Neither fzf nor neovim needs to be configured separately. Just open any file, and the dependencies for neovim will be installed. Don’t forget that this must be done for the low-privileged user as well as root.
| Shortcut Kitty | Command |
|---|---|
| New tab | ctrl+shift+t |
| Close tab | ctrl+shift+q |
| Next tab | ctrl+shift+right |
| Previous tab | ctrl+shift+left |
| Next layout | ctrl+shift+l |
| Move tab forward | ctrl+shift+. |
| Move tab backward | ctrl+shift+, |
| Set tab title | ctrl+shift+alt+t |
| New window | ctrl+shift+enter |
| New OS window | ctrl+shift+n |
| Close window | ctrl+shift+w |
| ctrl + shift + z | zoom |
- see more in the link
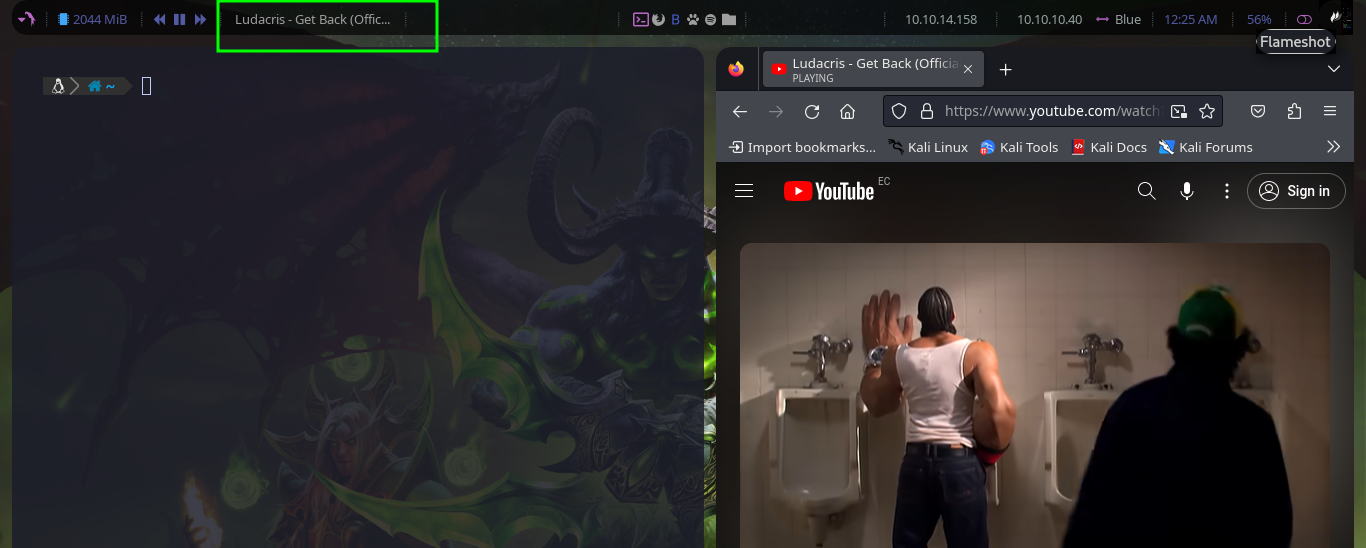
All of us who use this type of environment are used to seeing our IP and VPN from Hack the box. This is also implemented in the following way, for example.
To configure the IP and name of the HTB machine we use.
# file: "set target"
settarget 10.10.10.4 Blue
And to clean.
# file: "clean target"
cleartarget

It is also used to clear the target when there is no IP set, and if you click on the target IP you will copy it to the clipboard.
Still, I like my environment to be simple, so I have removed what I don’t need and implemented the following.
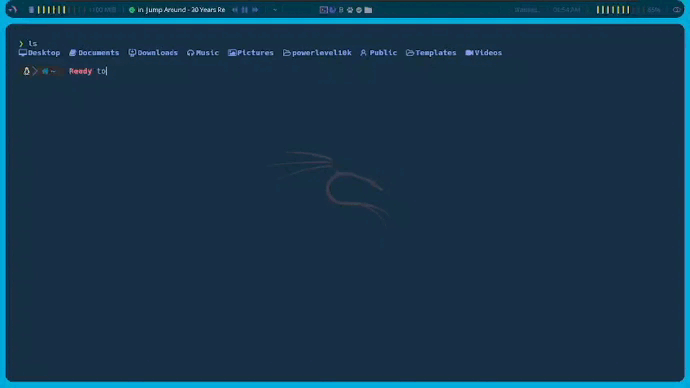
The location of the window will always tell you where you are located, no matter if you are between terminals, watching a video or whatever.
The interfaces for ctf’s.
Resizing applications is something that I really like because certain applications fit into the environment bar with just one click.
The implementation of spotify to hack with my favorite music.

Like most of us who have customized our environments, we have learned this thanks to s4vitar and even used his environment. But in the exercise of wanting to know more, how could I set up my own environment? I reached the conclusion of using the forest template since it has many utilities already implemented that can be taken advantage of, unlike the simple one that we all learned and replicated.
This looks like this, and also the letters move.

hotkeys
| Shortcut | Description |
|---|---|
| super + Enter | Terminal Emulator - /usr/bin/kitty |
| super + d | Program Launcher - rofi |
| super + Escape | Reload sxhkd configuration |
| super + alt + {q,r} | Quit/Restart bspwm |
| super + {_,shift + }q | Close/Kill window |
| super + m | Toggle between tiled and monocle layout |
| super + y | Send newest marked window to newest preselected window |
| super + g | Swap current window with biggest window |
| super + {t,shift + t,s,f} | Set window state |
| super + ctrl + {m,x,y,z} | Set window flags |
| super + {_,shift + }{Left,Down,Up,Right} | Focus window in given direction |
| super + {p,b,comma,period} | Focus next/previous window on current desktop |
| super + {_,shift + }c | Focus next/previous window on current desktop |
| super + bracket{left,right} | Focus next/previous desktop on current monitor |
| super + {grave,Tab} | Focus last window/desktop |
| super + {o,i} | Focus older/newer window in focus history |
| super + {_,shift + }{1-9,0} | Focus or send to given desktop |
| super + ctrl + alt + {Left,Down,Up,Right} | Preselect direction |
| super + ctrl + {1-9} | Preselect ratio |
| super + ctrl + alt + space | Cancel preselection for focused window |
| super + ctrl + shift + space | Cancel preselection for focused desktop |
| super + alt + {Left,Down,Up,Right} | Expand window |
| super + alt + shift + {Left,Down,Up,Right} | Contract window |
| super + ctrl + {Left,Down,Up,Right} | Move floating window |
| super + {Left,Down,Up,Right} | Custom move window |
| super + shift + f | Open Firefox |
| super + shift + g | Open Chrome |
| super + b | Open BurpSuite Community Edition |
| super + shift + o | Open Obsidian |
| super + q | Lock screen with i3lock-fancy |
🎉 Congratulations, you now have your own Environment!. 🎉